This will be my 7th and last but not least (for you gear heads) post on the John Wayne Pioneer Trail bikepacking trip. (However I may try to put together a quick list of the essential planning and route notes in an 8th post if people are interested).
In this post I’ll go over exactly what I carried with me on the trip and how my bike was set up. Thanks again for following along and I hope to continue to blog about my new adventures.
Starting off here are some pics of my bike bag setup. The bags are from Bike Bag Dude from Australia. Their Facebook page is the most current for pics of the bags in use but you can also visit their website.

Here is my bike shown with the full kit

Handlebar Roll, Chaff Bags and my trusty horse shoe…rust and all
I highly advise you to check out Ergon Grips. No I’m repping them. I paid hard cash for them and they were worth every penny and then some. They give your palm that much needed support allowing you to reduce the pressure on your ulnar nerves, preventing numbness.

The Chaff Bags and the “Garage” Top Tube bag were valuable pieces of kit.

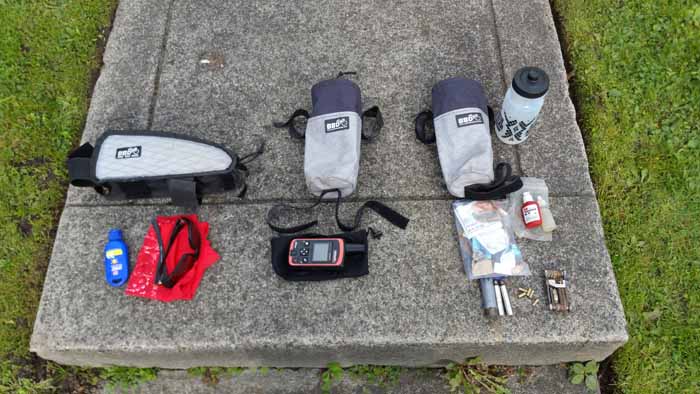
In the Chaff Bags I carried an extra water bottle (which had recovery drink in it), snacks for the day, multi tool, phone (which was my daily camera) and the Delorme Inreach GPS/satellite unit. I moved things to the “garage” TT bag when it was rainy and packed that with more snacks. The key with these three bags was convenience and accessibility.
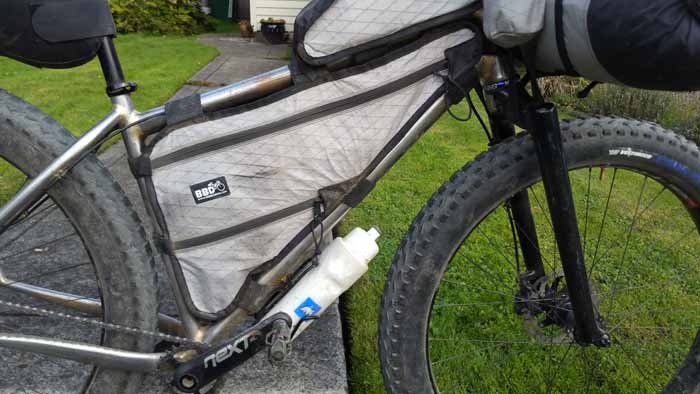
Here’s the fully custom front triangle frame bag. It was custom made exactly for the measurements of this frame for a perfect fit. You can also see here my extra water bottle holder on the down tube of the frame. It was rarely used but a nice addition when you’re away from a clean water source.

This is the Gear Jammer Seatbag by Oveja Negra Products which was made from the same exact material to match and is supplied by Bike Bag Dude as well.

I used a Race Face Next SL carbon crankset with a 26 tooth Narrow Wide chainring and a 42t Giant Cog/XTR cassette. Here in this pic you can also see that since it’s made to normally be a fatbike, there is a ton of clearance around the tires for a portaging handhold while using the 27.5+ wheelset as shown.

The wheelset was a Stans Hugo 27.5+ tubeless rim set up with a 3.25 tire. This setup was perfect for this trip. 29+ will also fit in this frame and is on my wish list of things to add to this bike.
That gives you an idea of what the bike setup was like. It was pretty slick. I’d highly recommend this type of bike if you plan on riding the entire way. A cross/hybrid type bike may be doable but really I wouldn’t try it with anything less than a mountain bike with the widest tires you can fit, and preferably set up tubeless.

48.87lbs. Not bad for a fully loaded steel B+ bike with full camping gear for nearly a week! The bike alone weighed 25lbs. So including some more food and water that was on my back I’d say I had about 32lbs of gear and food/water with me at any given time.

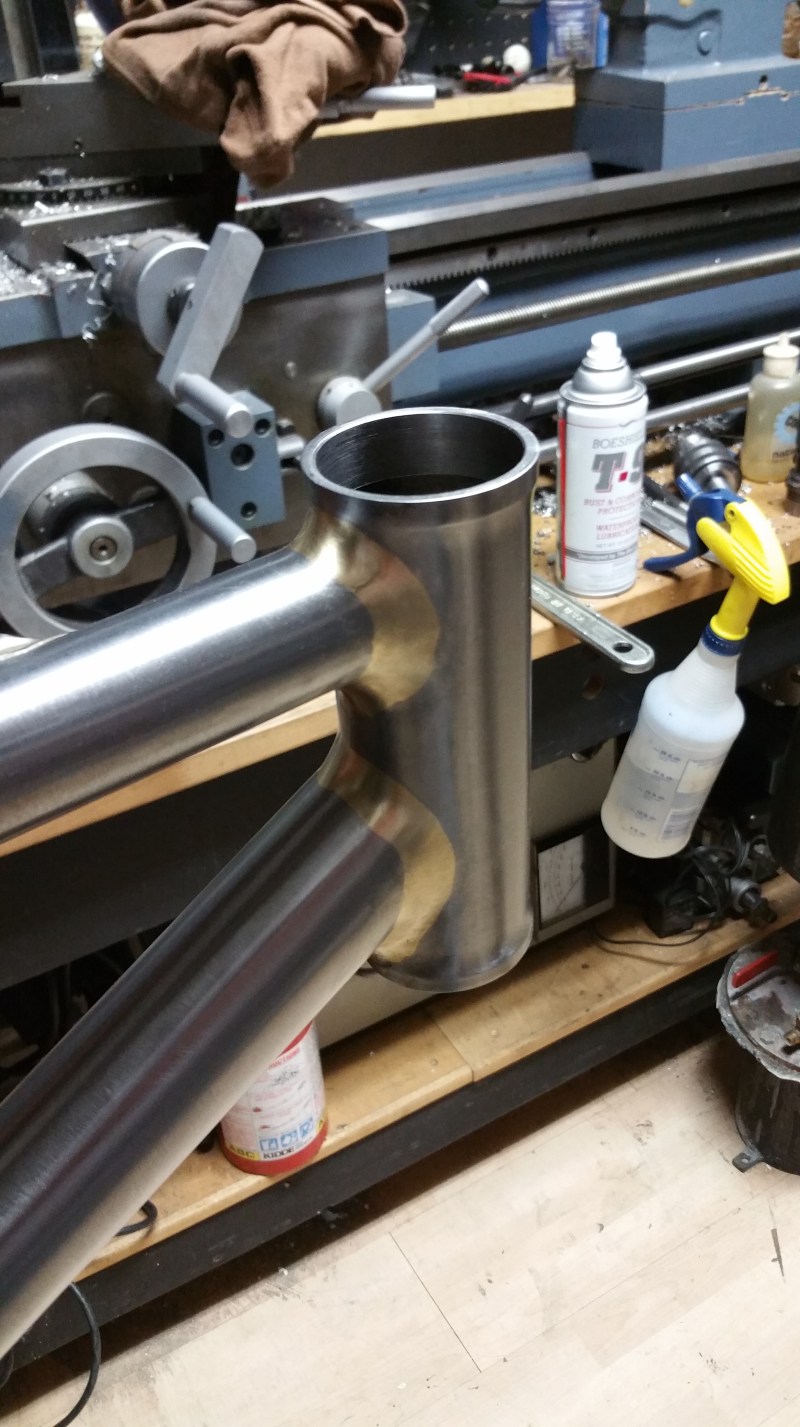
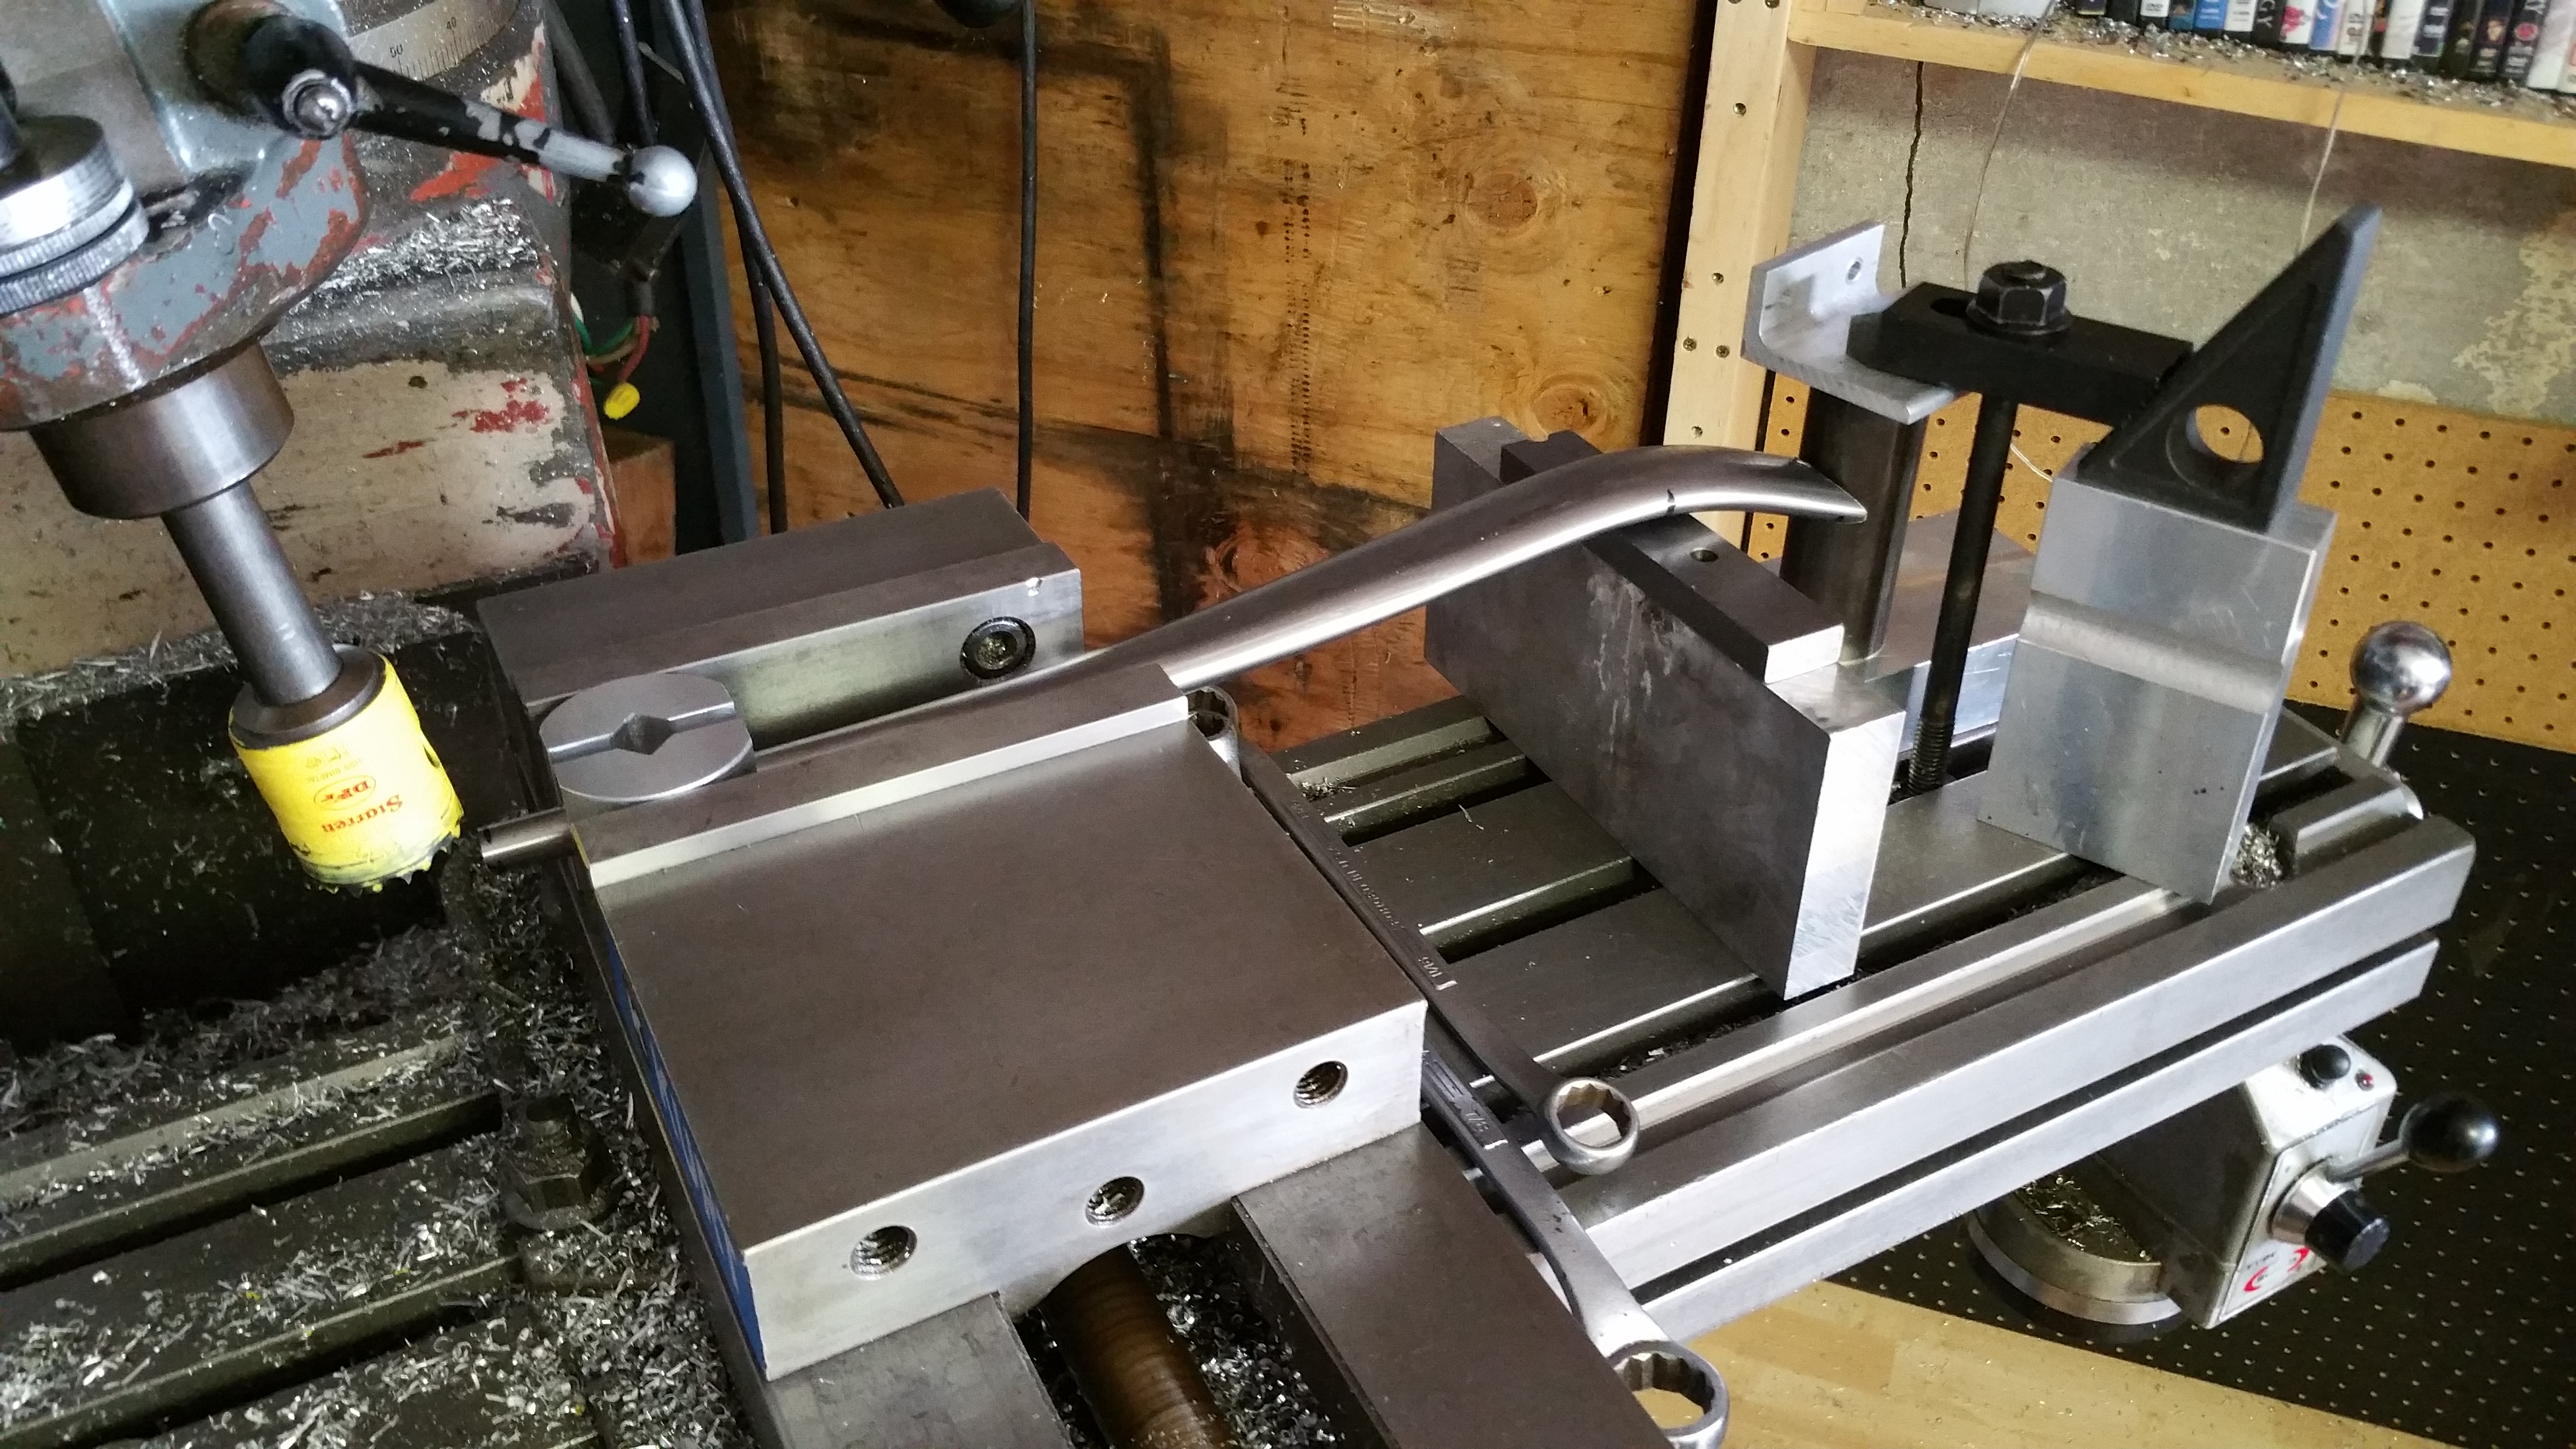
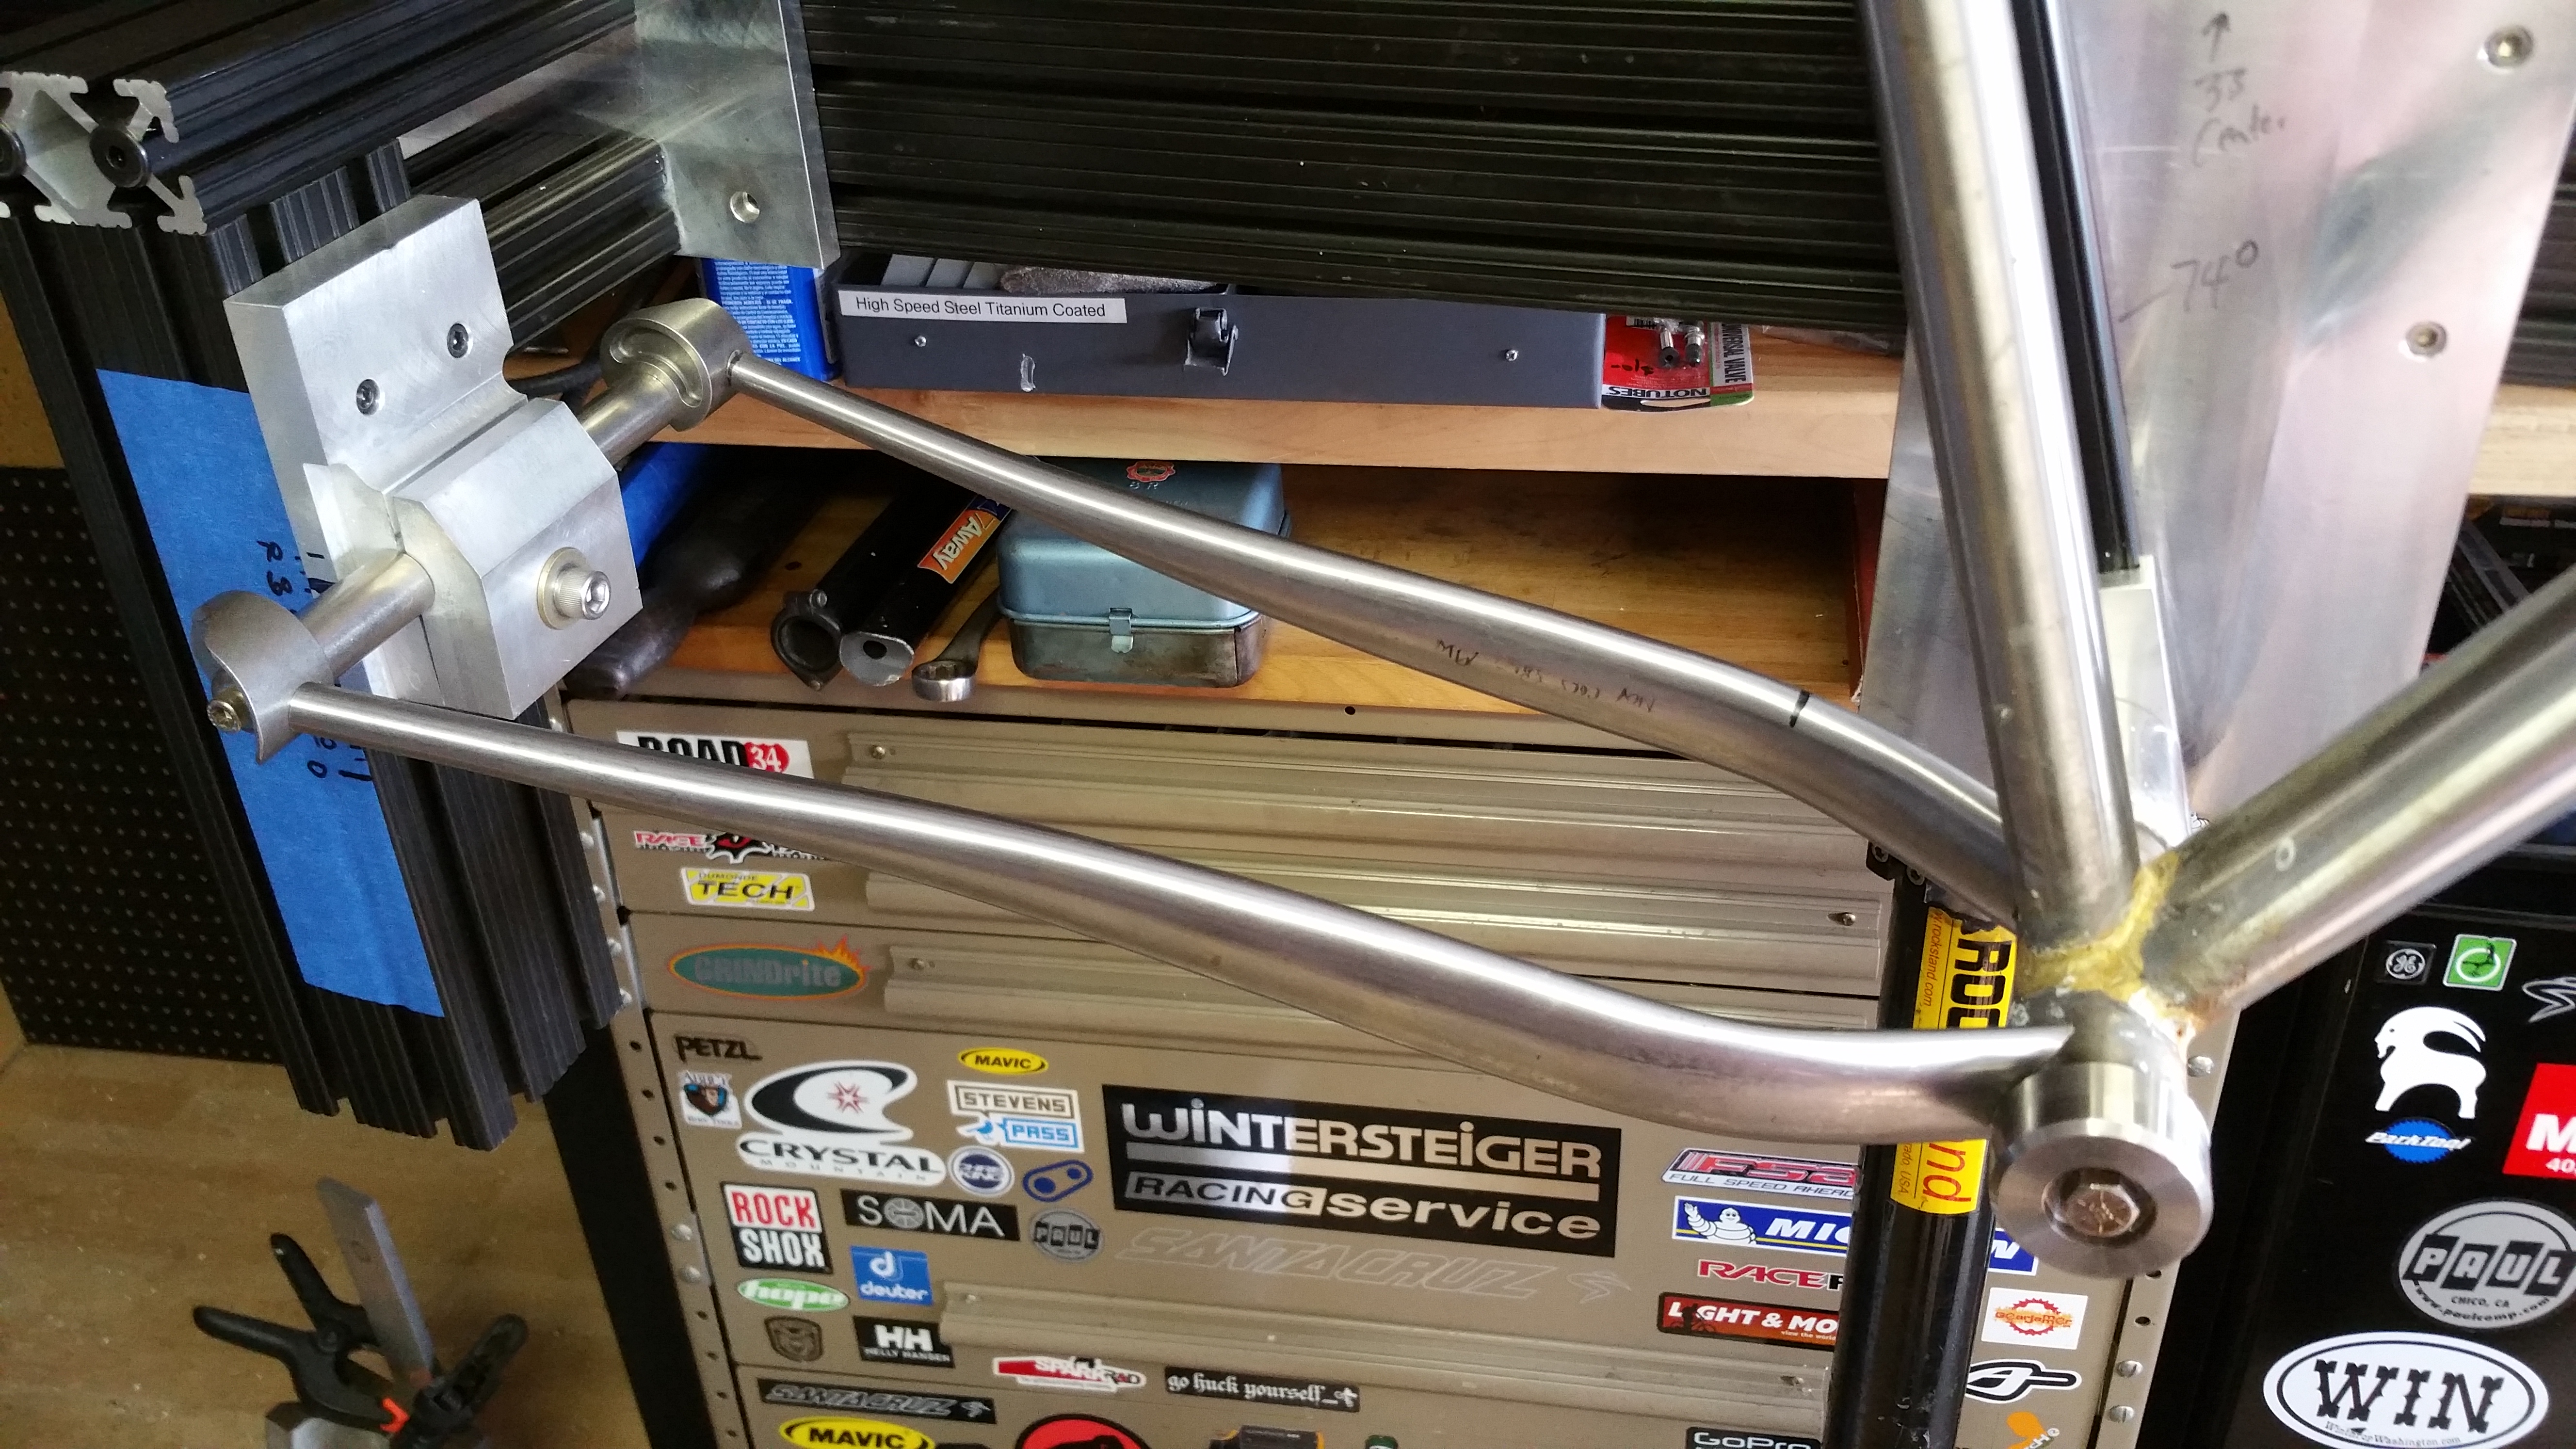
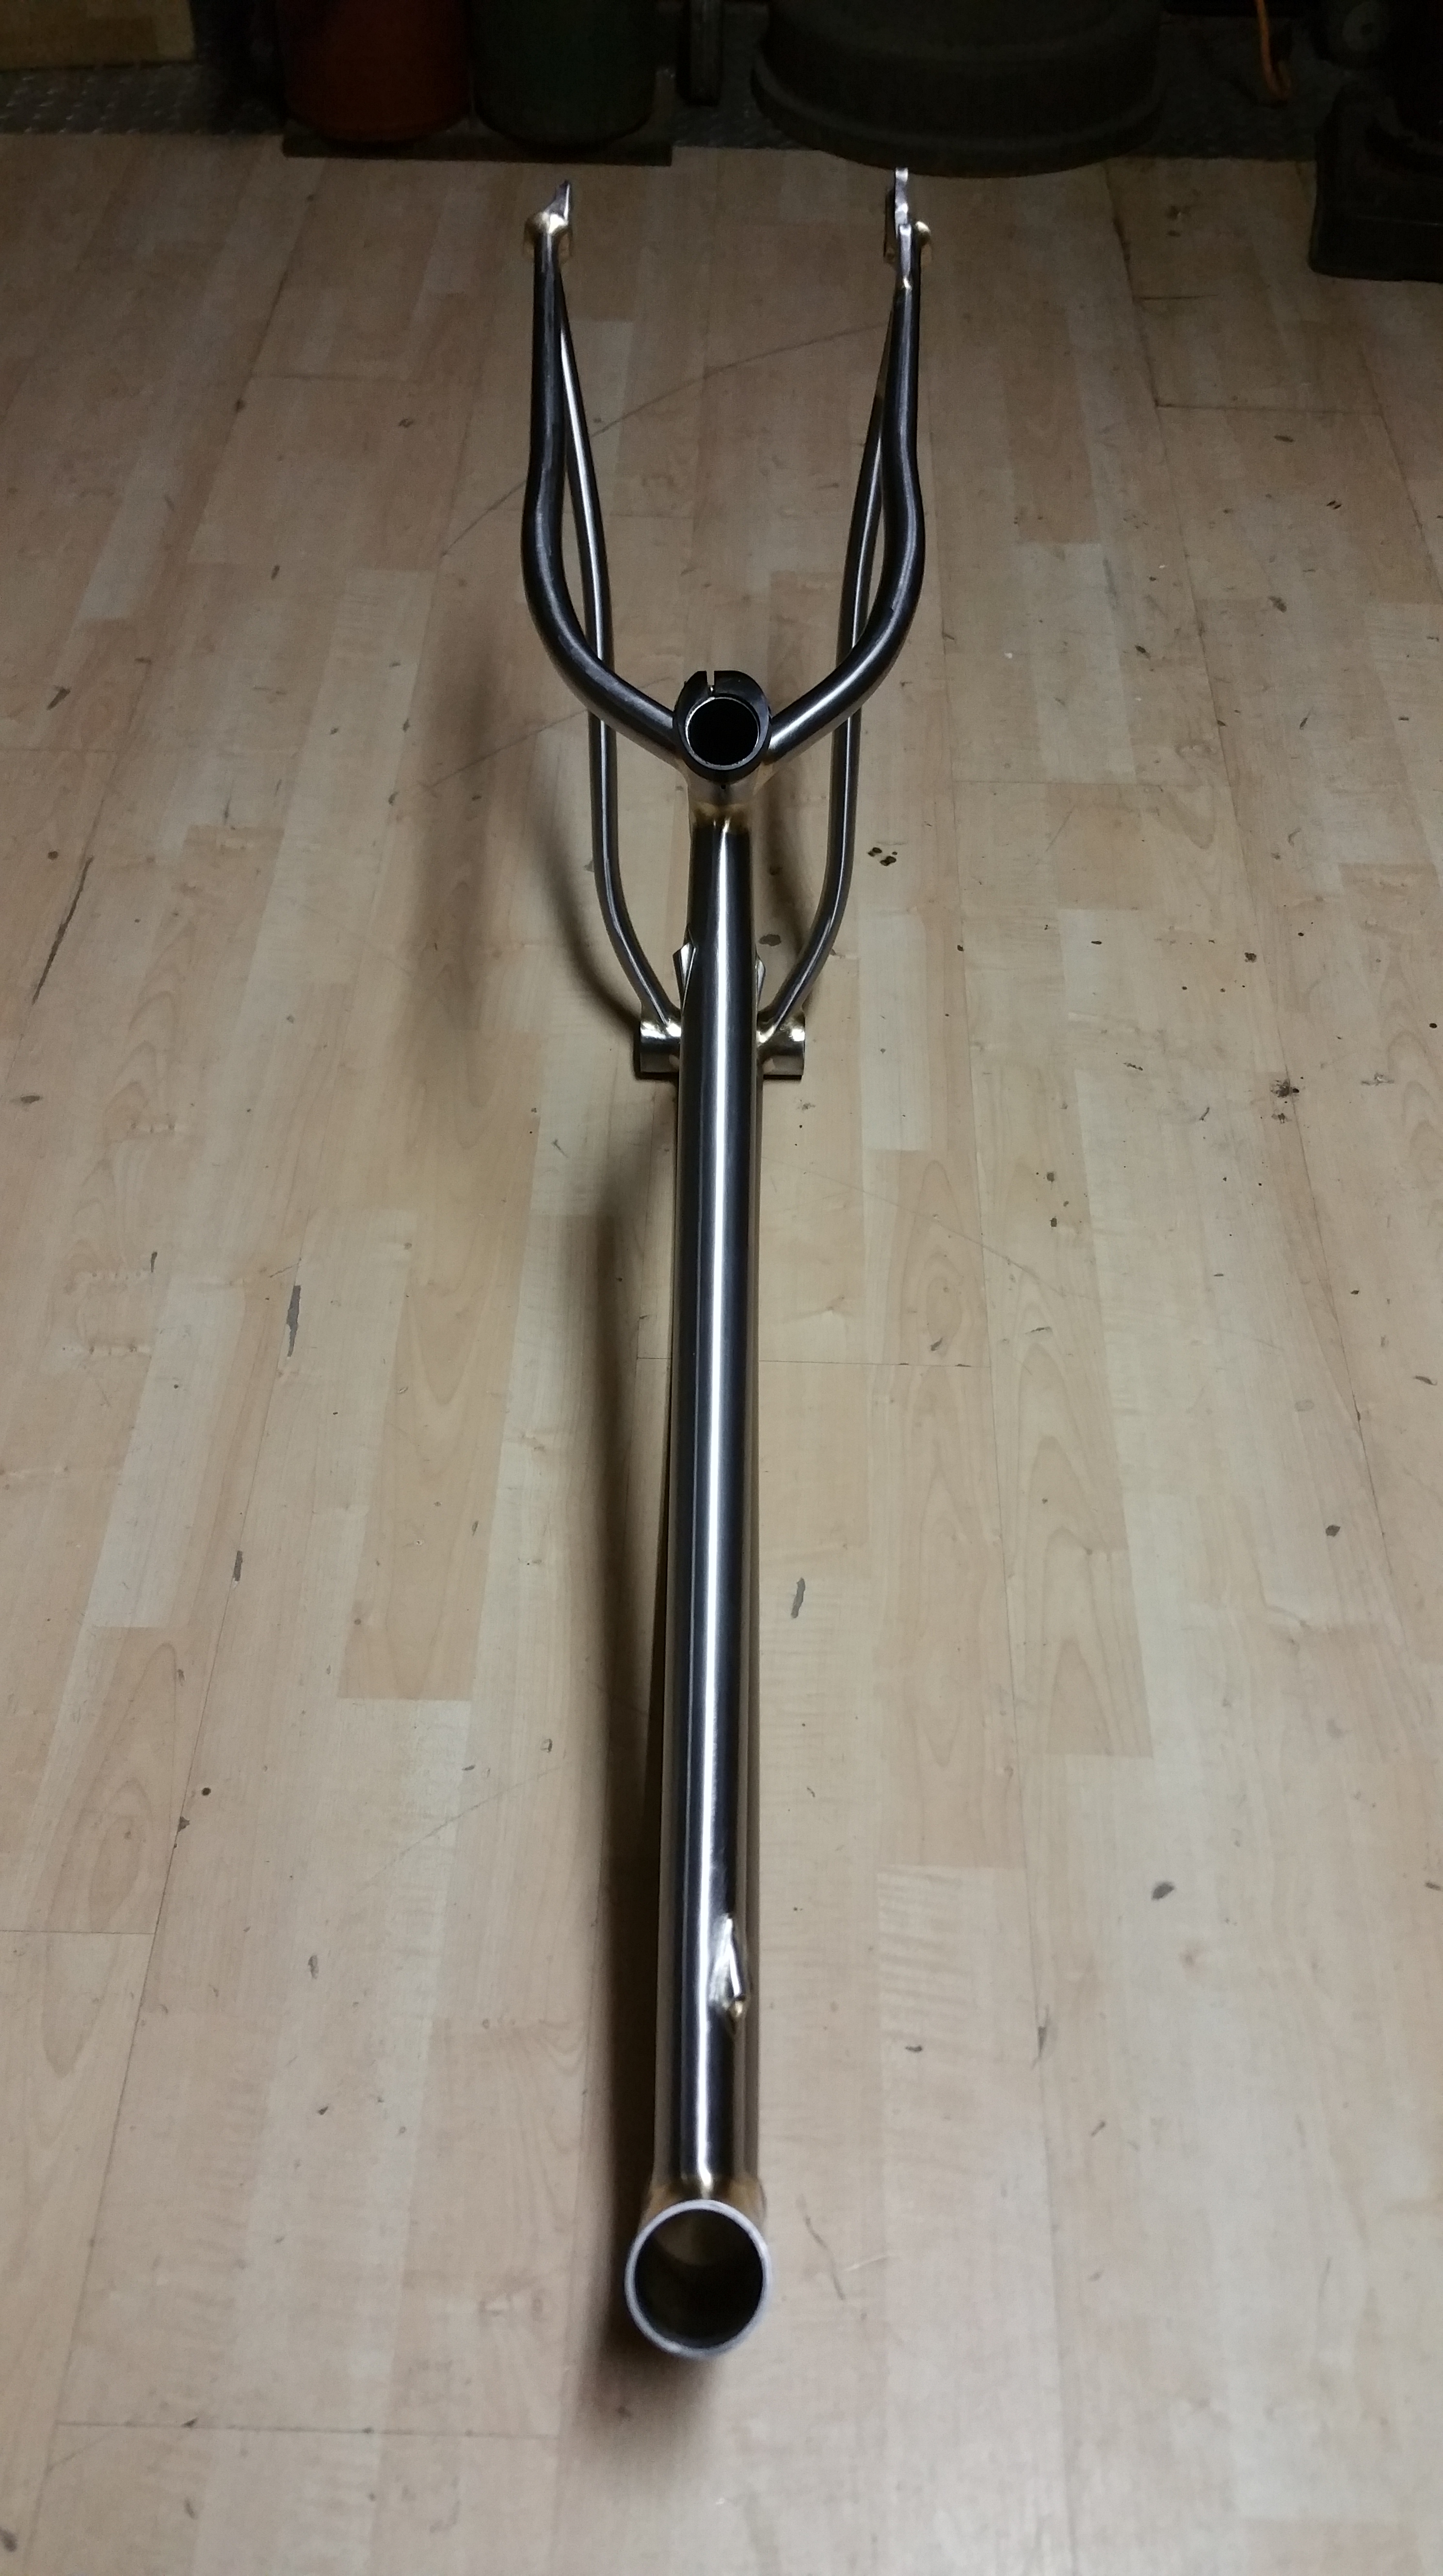
Please excuse the dirty workshop 🙂 It is the birthplace of this frame though!
Next, I’ll start detailing what was in each bag. Here’s the entire kit layed out.

The price of a full bikepacking kit like this would be more expensive than a double rack and pannier setup but not by much. The reason we use a kit like this is to keep everything as close and tight to the bike for when you are riding trail or portaging a bike (it can be hard to push or carry a bike with racks). It’s usually lighter and can be more reliable as well. It’s very modular and portable. I put a lot of this stuff on all my other bikes and road bike for day rides too.
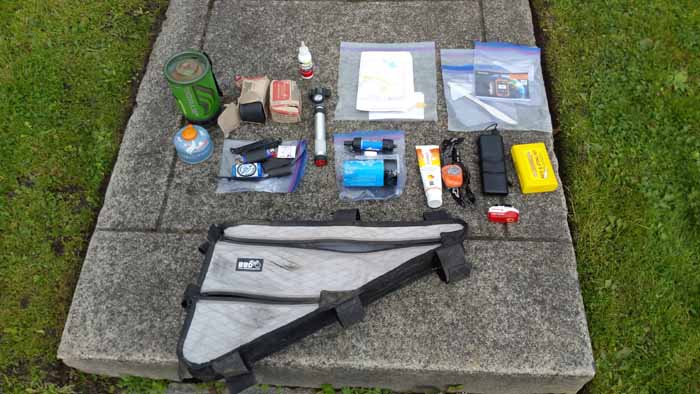 Here we have the front triange bag. For the most part I had these items in it.
- Jetboil Stove with gas canister and an extra just in case (The stove, integrated “pot” and full gas cartridge weighs 592g)
- 2 extra 27.5 tubes and an extra 2oz bottle of Stans fluid (next time I’d bring 2)
- Crank Brothers High/Low volume Pump, patch kit courtesy of NWBIC, 2 tire levers, zip ties, duct tape wrapped around a lighter, extra chain links, master link, Hayes disc brake pad reset tool and a small bottle of lube.
- Sawyer Mini water filter and fill bag, sunscreen, headlamp, rear blinky,Anker 21000 mah battery pack which lasted for 4 days charging my phone/camera and Inreach, snakebite kit and directions for the Deloreme Inreach and maps.
- TP and wetwipes in a ziplock
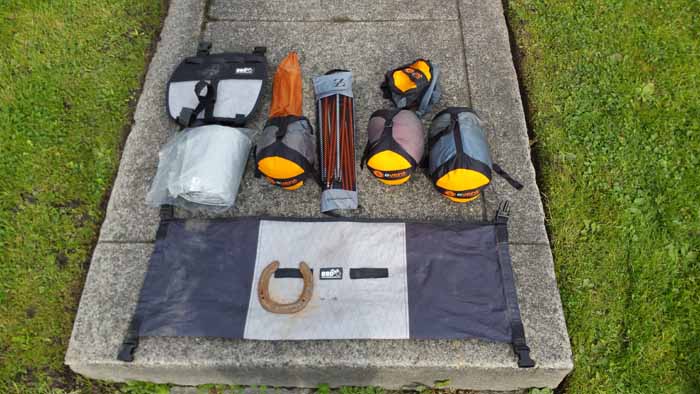 The Bar Roll was another very important bag to the system carrying my entire sleep system cleanly off the handlebars.
- Sleeping bag -Mtn Hardwear Mtn Speed 32 850 Qsheild down (super light and packable at 1lb!)
- Tent-Big Agnes Copper Spur UL 1. Super sweet fast free standing tent at just over 2lbs. I really don’t see why people bother with bivy sacks these days…..(I kept the rainfly in a seperate Sea to Summit Ultra Sil compression bag. These are all featherlight XXS bags fyi)
- Full Length Cascades Designs Neo Air which weighs nothing…thing is noisy though!!
One trusty found horse shoe pointed up to catch the good luck. It was worth it’s weight in gold… The seatbag was yet another big player. It allowed for me to carry all my clothing tucked behind out of the way and also detached easily at night to bring into the tent.

- Mountian Hardwear Ghost Whisperer 850 Q shield down hooded down jacket. One invaluable tool and doubles as a pillow! (Used multiple times a day)
- Marmot Super Mica rain jacket (uesed once, on 1st day) and beanie hat (perfect for evenings and sleeping
- Komperdell Alpine seamless welded neoprene gloves (never used them)
- Packtowel and large contractors garbage bag
- Two button up synthetic shirts, wool ski socks, 4 pairs of cycling socks and an Icebreaker merino wool t and shorts to sleep in.
- And a backup ziplock with TP, just in case the trail food get’s the best of you…

- The “Garage” top tube bag and Chaff Bags held the electronics, extra water, lube, multi tool, Delorme In Reach navigator, phone, sunscreen, sunglasses, hankie, extra food and snacks for the day plus misc shell casings I found….Hey, I’m like a crow. I pick up shiny things.
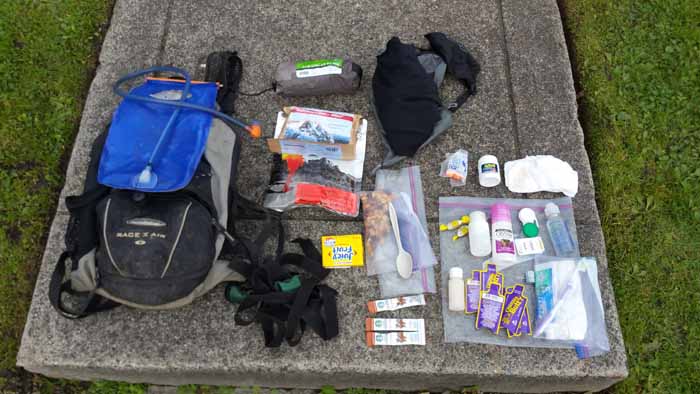
- The Backpack was something we both wanted to not bring but for a fall trip with issues with water we just couldn’t risk it. I carried a full water bladder, extra straps, dehydrated meals, Starbucks VIA instand coffee, an REI inflateable seat (which got used once but was worth it)
- Bathroom bag had Chamois Butter cream (for the rear end and rubby bits, toothbrush and toothpaste, deoderant, lotion, contact stuff and extra eyes, cough drops (since cold mornings and snoring all night can really do a number on your throat lol), Tylenol and Ibuprofen and ear plugs.

- Here is what I wore every day.
- Or softshell pants. I have thousands of miles on these things. They are water resistant and I’ve worn them in 20 below in Alaska. Dirty old school Shimano cycling shoes, Cracked Giro helmet, old nasty gloves with holes in them, cycling inner shorts and my favorite new “hillbilly” wet suit button up short sleeve cotton shirt…..man I loved that shirt 🙂


Thanks for following along! Till next time……
You can read about the entire JWPT trip starting here and more about the making of my frame here